
Cue care · 3 min read
Use Pool Cue Joint Protectors Without Damaging the Joint
A two-piece cue usually exposes two opposite interfaces when separated: a male pin on the butt and a female insert in the shaft. The protector pair must be the opposite of each interface. Correct thread, pilot, face and collar geometry matter; color and approximate diameter do not prove a match.
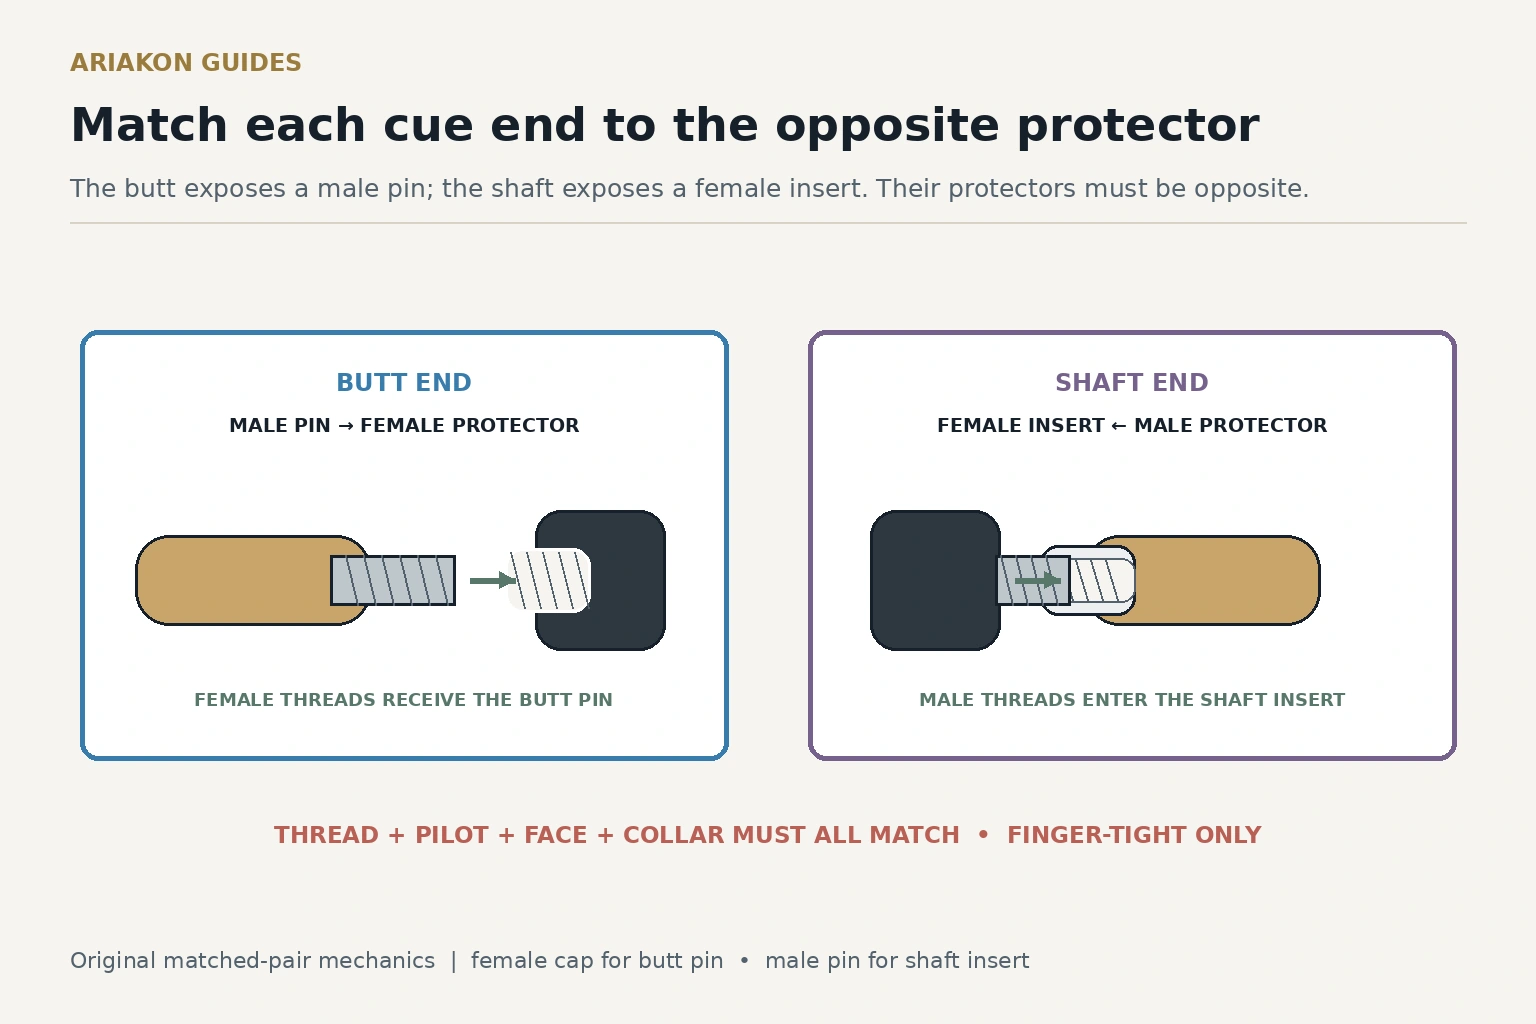
Pair each exposed interface with its opposite
| Cue end | Exposed interface | Protector needed | Stop if |
|---|---|---|---|
| Butt | Male joint pin | Female threaded protector with compatible face and pilot clearance | It rocks, binds, bottoms early or needs force |
| Shaft | Female threaded insert | Male protector pin with compatible thread, shoulder and pilot | It starts crooked, leaves an unexplained gap or contacts the wrong surface |
| Either end | Joint face and collar | Protector that seats without scraping or loading the collar | The collar or ring takes the clamping load |
Identify the cue joint before buying accessories when the thread or pilot is unknown.
Pack a cue case for match day for the fitted-case layer around protected cue sections.
Record the protector set before mixing accessories
If measurements are needed, record them in millimeters with tool resolution. Do not use the measurement as a machining instruction; it is identification evidence for the supplier or technician.
Keep the matched pair assigned to one cue unless a qualified fit check establishes interchangeability. Decorative similarity is not mechanical compatibility.
| Field | Record | Reason |
|---|---|---|
| Cue label | Neutral case label or cue record | Prevents similar sets from being swapped |
| Thread and pilot | Known designation plus square photographs | A thread nickname may omit pilot geometry |
| Face and collar | Contact surface and outside diameter | Prevents bottoming or edge load |
| Protector side | BUTT/FEMALE and SHAFT/MALE | Makes the mechanical pairing explicit |
| Condition | Clean, dry, undamaged threads | A protector can trap grit or moisture |
Clean, align and stop at finger-tight
Inspect the cue end and protector under good light. Remove only loose dry debris with a method approved for the actual material. Let any approved cleaning leave both parts dry. Align squarely and begin with fingertips.
Stop when the protector seats without play. Do not use pliers, tape, oil or thread-locking compound. Repeated loosening, roughness or a changed fit is an inspection signal, not a reason to add torque.
Use the case as the second layer
Place the protected butt and shafts in fitted compartments so they cannot strike one another or carry other equipment. A protector reduces direct contact at the joint; it does not make loose cue sections safe in an oversized bag.
Remove protectors over the open case or another controlled surface. If one falls, inspect and clean it before reinstalling so collected grit does not enter the joint.
Worked check: both caps look alike
A pair of black accessories both show female openings. One can cover the butt pin, but neither can enter the shaft's female insert. The correct response is not to balance a cap over the shaft face; obtain the matching male protector pin for that insert.
With the correct pair, the female cap seats on the butt pin and the male protector seats in the shaft insert by hand. Both clear the pilots and load the intended faces without scraping the collars.
Sources and further reading
References support the specific factual information above. The practical checklists are Ariakon editorial guidance.