
Position play · 3 min read
Pool Position Play for Beginners: Start With a Large Target Zone
Beginners often aim the cue ball at a dot, then call a useful playable area a failure. Position play becomes clearer when the first target is large enough to show what the next shot actually needs. This ladder uses one simple shot and three nested zones. The zone contracts only after repeated evidence; a smaller rectangle is not automatically better practice.
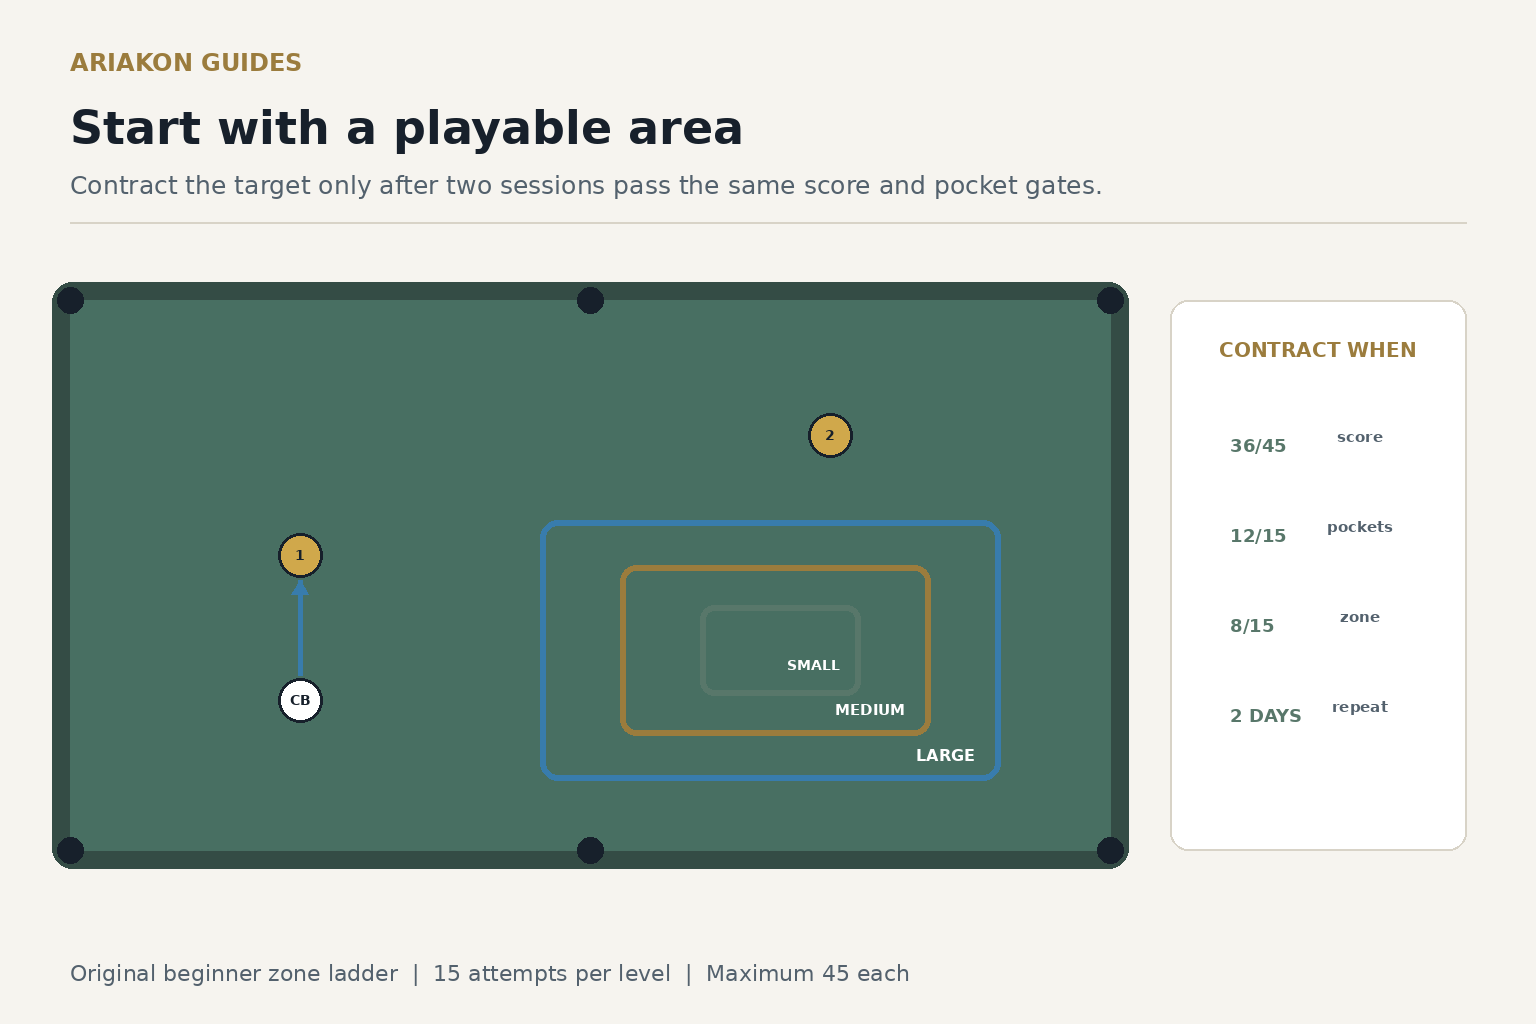
Build a simple two-ball picture
Place Ball 1 on a clear line to a foot corner and choose a comfortable cue-ball start for a simple cut. Put Ball 2 near table center and choose its intended pocket. During unscored trials, find a legal vertical-axis route from Ball 1 into a broad area that leaves an unobstructed, comfortable Ball 2 shot. Record the two starts and Ball 2 center. Then mark the nested zones and freeze all centers before scoring.
The starting zone should be about two diamonds long and one-and-a-half diamonds wide, adjusted so every part leaves the intended Ball 2 shot. Mark a medium zone inside it at roughly one-and-a-half by one diamonds and a small zone near the preferred center at roughly one by half a diamond. The playable geometry controls the marks, not the numbers alone.
Learn area, line and point position after the large-zone idea is familiar.
Advance to cue-ball route control when the player can score broad zones consistently.
Call three facts before every shot
| Fact | Example | Purpose |
|---|---|---|
| First pocket | Ball 1 to foot corner | Keeps aim explicit |
| Cue-ball action | Natural roll on vertical axis | Limits variables |
| Target zone | Large blue rectangle | Defines playable success |
Shoot fifteen attempts at each level
| Level | Zone | Attempts | Maximum |
|---|---|---|---|
| 1 | Large playable area | 15 | 45 |
| 2 | Medium area | 15 | 45 |
| 3 | Small preferred area | 15 | 45 |
Score the first shot and final center
Apply scores in this order: foul or miss 0; pocket plus called zone 3; pocket plus an intermediate zone 2; every other legal pocket 1. At the large level, there is no intermediate zone. At the medium level, the large zone is intermediate. At the small level, the medium zone is intermediate. The boundaries and the first applicable rule decide each score once.
| Points | Ball 1 | Cue-ball finish | Record |
|---|---|---|---|
| 0 | Miss or foul | Any | First failed event |
| 1 | Pocketed | Outside the large zone, or in the large zone outside the called zone with no intermediate zone crossed | Short, long, left or right |
| 2 | Pocketed | Inside an intermediate larger zone, but outside the called zone | Nearest boundary |
| 3 | Pocketed | Center inside called zone | Clean attempt |
Contract only after a repeatable pass
A level passes when the player scores at least 36 of 45, pockets Ball 1 at least 12 times and finishes in the called zone at least 8 times. Repeat the level on a second day. Move inward only after both sessions pass. These are practice gates for this drill, not a player rating.
Worked example: Level 1 scores 39 with thirteen zone finishes and two misses. On the second day it scores 37 with twelve zone finishes, one additional legal pocket outside the zone and two misses. Level 2 then scores 28, with six long finishes. The correct next action is another medium-zone block using the same line and a slightly shorter speed call—not jumping to the small zone.
Turn the zone into a two-ball pattern
If Ball 2 fails while the cue ball is inside the zone, keep the position result and diagnose the second shot separately. A target zone is useful because it leaves a playable next shot; it cannot guarantee the next ball will be pocketed.
| Point | Requirement |
|---|---|
| 1 | Pocket Ball 1 legally |
| 1 | Cue-ball center finishes in the passed zone |
| 1 | Pocket Ball 2 in the called corner |
| Maximum 18 | Six complete two-ball attempts |