
Cue-ball control · 3 min read
Learn Sidespin With a Single Cushion Route Drill
Isolate cushion response before adding an object-ball collision. This cue-ball-only calibration holds the start, first cushion target and speed intention fixed while comparing three modest spin conditions. Then test the observed response in a separate position-play layout. A geometric sketch supplies a reference direction; it cannot predict a real table’s spin response.
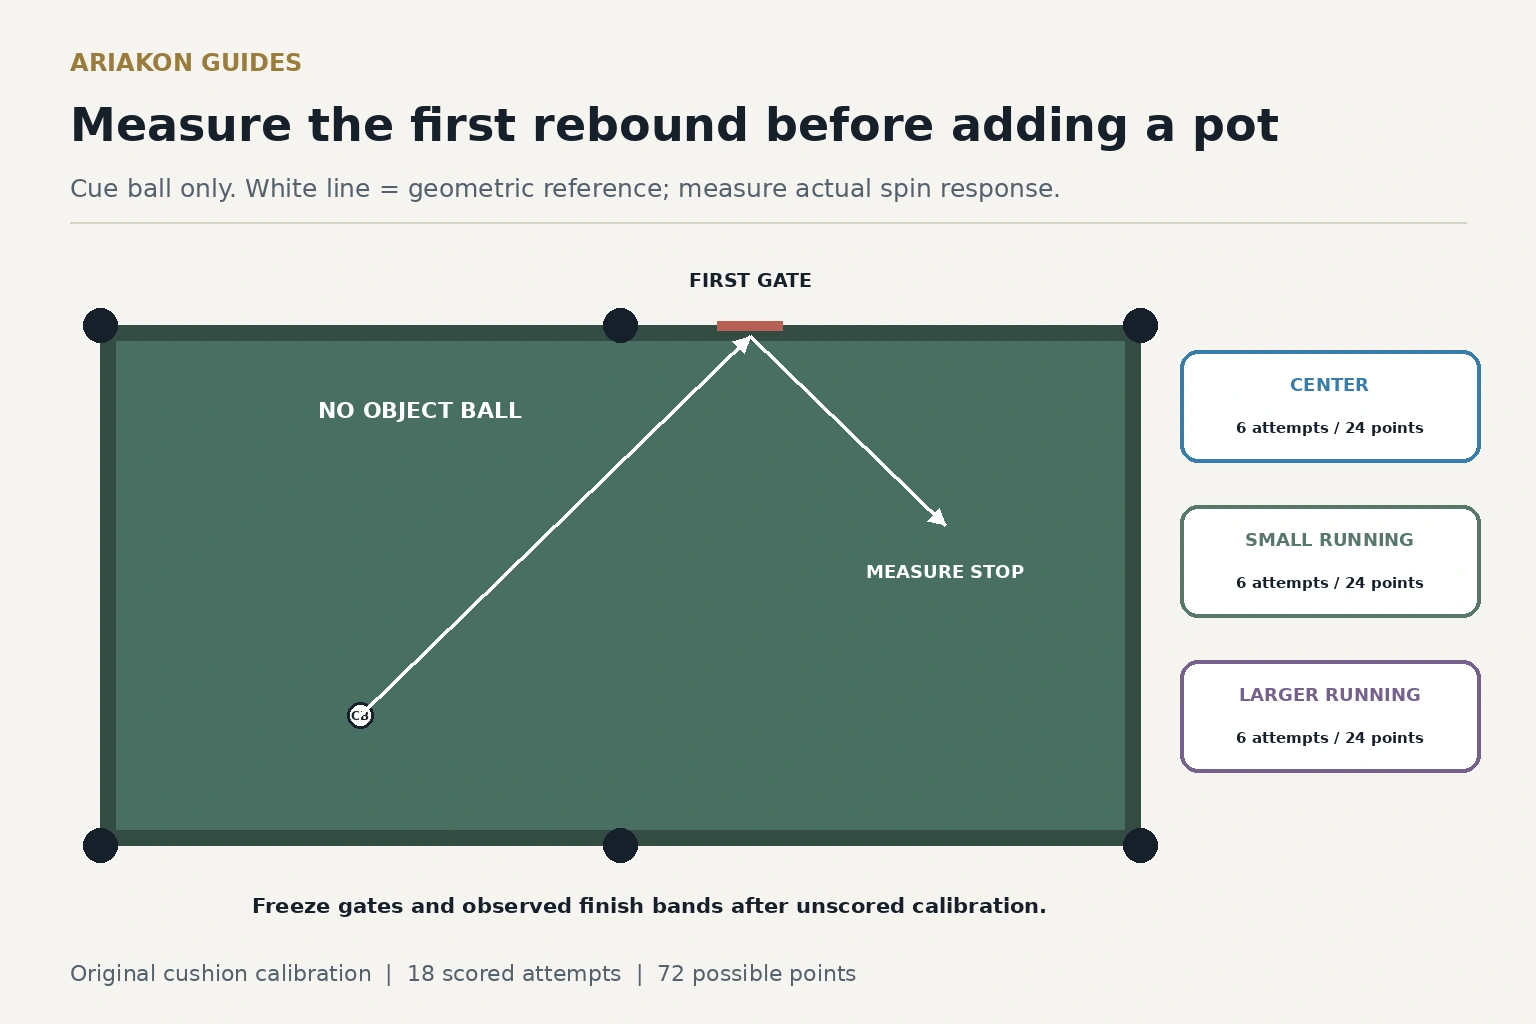
Mark a cue-ball-only cushion calibration
Use a 100 by 50 inch example playing surface with 2.25 inch balls. Coordinates are ball centers in 12.5 inch units: x runs 0 to 8 along the length and y runs 0 to 4 across the width. Place the cue ball at C=(2,1), with no object ball. Its radius is 0.09 unit. Aim toward a first long-cushion gate centered at the ball-center contact R1=(5,3.91), away from the side pocket at (4,4). The physical cushion-nose target is (5,4). Use a gate half a unit wide along x.
Use unscored center-ball trials to establish a comfortable speed that reaches the first cushion and stops before a second cushion. The ideal equal-angle reference passes through (6.5,2.455), but the measured response is the authority. Correct the first gate if necessary during calibration, then freeze it. Compare rebound direction and finish distance without requiring an object-ball pocket.
Compare center ball, a small repeatable running-spin offset and a slightly larger comfortable running offset. Label the actual left or right offset from your shooting view; running describes its effect at the contacted cushion.
Before each block, take two unscored trials, declare a finish band from the observed route and keep it fixed for the six scored attempts. Use the same speed intention; record unavoidable speed differences. Bands must fit fully on the bed with ball-radius clearance. No maximum offset or universal tip fraction is prescribed.
Learn when sidespin is useful before choosing it in a rack.
Detect accidental sidespin if center-ball results spread both directions.
Advance to a two-rail route after this first rail is repeatable.
Run three six-shot blocks
Run six scored attempts in each condition and reset the exact start. Log gate, cushion order, final center and scratch separately. On another day reverse the block order. A scratch receives zero route and finish points; retain the declared process point if earned. Do not move a gate or band around a successful shot.
Diagnose the first mismatch: a missed first gate concerns starting aim, delivery or speed; a first-gate pass followed by a different rebound concerns cushion response and incoming spin; a matching route with a long or short finish calls for speed calibration. This drill does not test object-ball throw or pocketing.
| Point | Condition |
|---|---|
| 1: Declaration | Spin, speed and finish band stated before stance |
| 1: Gate | First cushion contact inside the fixed gate |
| 1: One cushion | Cue ball rebounds and stops before a second cushion |
| 1: Band | Cue ball center finishes in the declared band without a scratch |
| Maximum | 24 per six-attempt block; 72 over eighteen attempts |
Worked result and transfer
Hypothetical totals: center 21/24, small running 20/24 and larger running 13/24. The larger offset reaches the first gate only twice. Return to the smaller offset and a narrower speed range rather than chasing a distant finish band.
For transfer, set six different three-ball position layouts with a legal first contact and a clear pocketing line under the named game. Before shooting, compare a center-ball option with a single-cushion route and mark a generous next-shot zone. Score the choice and pocketing separately from the cushion calibration. Rebuild the incoming object-ball contact for each layout; never copy the cue-ball-only starting line as a post-collision route.