
Visual alignment · 5 min read
Pool Cue Alignment for Cross Dominant Eyes
Cross dominance means the eye that tends to lead a sighting task is opposite the hand used for the cue. It does not automatically require switching hands, closing an eye or twisting the cue under the dominant eye. The useful question is which comfortable head and cue relationship makes a physically straight line look straight and repeat under play.
Treat eye dominance as context, not a prescription
Do not choose a stance from an eye-dominance label alone. Compare the physical cue line, your sight picture and comfortable delivery. The cue may appear straight from different head positions; a comfortable repeatable result is the question this worksheet tests.
This comparison does not diagnose visual function or establish a universal relation between eye dominance and performance. Keep the cueing hand fixed, use mirrored layouts and retain raw results so a preferred head position is tested rather than assumed.
Find a general repeatable vision center before using the cross dominance comparison.
Keep hand choice and head position separate
Use your normal cueing hand for the first comparison. Changing hands changes bridge skill, grip control, stance and stroke at the same time, so it cannot isolate visual alignment. Do not close or cover an eye unless an eye care professional or qualified instructor gives a specific reason; binocular vision contributes useful distance and angle information.
A head position is unacceptable if it causes neck strain, tilts the eyes sharply, blocks the cue or destabilizes the stance. The candidate must let the cue travel freely and the eyes remain as level as practical. Comfort is part of the result, not a cosmetic preference.
Find three candidate positions from a physical line
With the table owner’s permission, place a clean shaft gently along a measured straight shot line as a temporary visual reference. Remove it before shooting. Lower into your normal stance without a stroke and compare the apparent cue line with the physical line. A reference that can roll or obstruct anyone is unsuitable; ask an instructor to register the line instead.
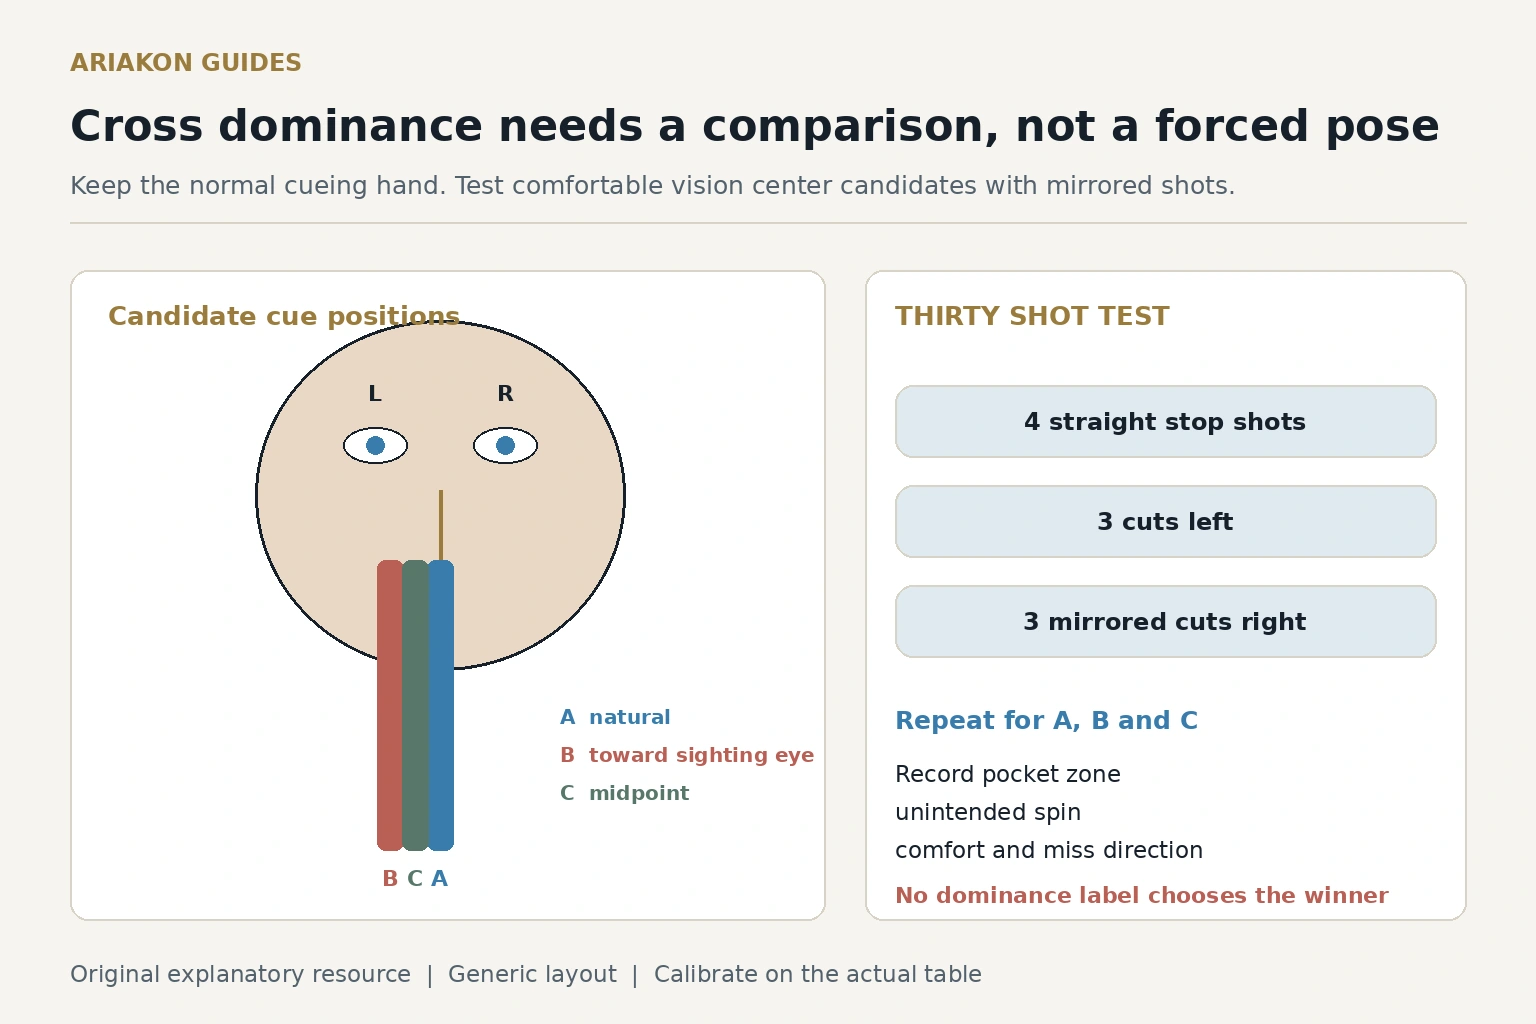
Record three comfortable candidates: A is the natural baseline, B is a small shift toward the sighting eye, and C is the comfortable midpoint between A and B. Use a nose or chin landmark to return to each area. Do not assign millimeters or force the cue directly under an eye.
Run a rotating thirty shot comparison
For each candidate shoot ten shots: four long straight stop shots, three moderate cuts to the left and three mirrored cuts to the right. Use ordinary pocket speed, the same cue ball and object ball distances, and the same standing approach. Rotate the order A, B, C on day one and B, C, A on day two if you repeat the test.
Score two points for an object ball entering the center half of the called pocket, one point for a pocketed ball outside that center half, one point for the cue ball showing no unintended sidespin on a straight stop shot, and one point for a balanced comfortable finish. Cut shots do not receive the straight stop spin point. Keep raw results rather than comparing only totals.
The pocket scores are mutually exclusive: 2 for the center half, 1 for another legal pot, and 0 for a miss or foul. Record the straight-shot spin point only when a suitable marked cue ball and clear observation make rotation visible; otherwise mark unknown and exclude that point from the observed denominator. Maximum with all spin observations available is 34 per candidate: 20 pocket, 4 spin and 10 comfort points. Keep those components separate.
| Candidate | Straight center pockets out of 4 | Left cuts out of 3 | Right cuts out of 3 | Unintended spin notes | Comfort out of 10 | Miss direction |
|---|---|---|---|---|---|---|
| A natural baseline | Fill in | Fill in | Fill in | Fill in | Fill in | Fill in |
| B small shift toward sighting eye | Fill in | Fill in | Fill in | Fill in | Fill in | Fill in |
| C comfortable midpoint | Fill in | Fill in | Fill in | Fill in | Fill in | Fill in |
Read straight and mirrored results together
A candidate that improves straight shots but creates a one direction cut bias is not yet a complete answer. Check whether the head shifted or tilted differently on the mirrored shot. A candidate with similar left and right results, centered straight contacts and lower effort is more useful than one spectacular block.
If every candidate shows the same miss, inspect standing alignment and cue delivery. If rear video shows the cue physically off line while it appears centered, return to the vertical axis diagnostic. If the cue is physically centered but moves during the stroke, a head shift will not repair the delivery.
Diagnose a centerline perception bias when the cue looks centered but video disagrees.
Use a worked decision rule
Suppose candidate B improves straight center contacts but causes discomfort and does not improve mirrored cuts. Reject it even if the dominance label suggested that direction. If candidate C produces similar left and right patterns, a stable cue line and lower strain, repeat C against baseline A on another day.
Keep a change only when the physical cue line, ball results and comfort point the same way. This example explains the rule and does not report an actual player's test. A dominance label never outranks repeatable evidence.
Know when to get another set of eyes
A qualified instructor can place the camera, verify the shot line and notice whether the head or cue shifts during entry. Bring the completed worksheet so the session begins with patterns rather than guesses.
See an eye care professional for double vision, sudden changes, headaches, persistent strain or concerns that occur away from pool. Do not use table drills to diagnose or treat a visual condition. The goal here is a comfortable repeatable sports alignment, not a medical conclusion.
Choose a qualified pool coach for observed alignment and stroke feedback.
Compare pool eyewear requirements when the prescription or frame view affects the stance.