
Cue-ball contact · 3 min read
Map Intended and Actual Cue Tip Contact With a Feedback Ball
A player can intend center, high or low contact and still deliver the tip somewhere else. A visible feedback ball turns that difference into evidence. This guide compares practical feedback methods, then uses one marked ball to map a repeatable contact bias without pretending that a pocketed ball proves the tip landed correctly.
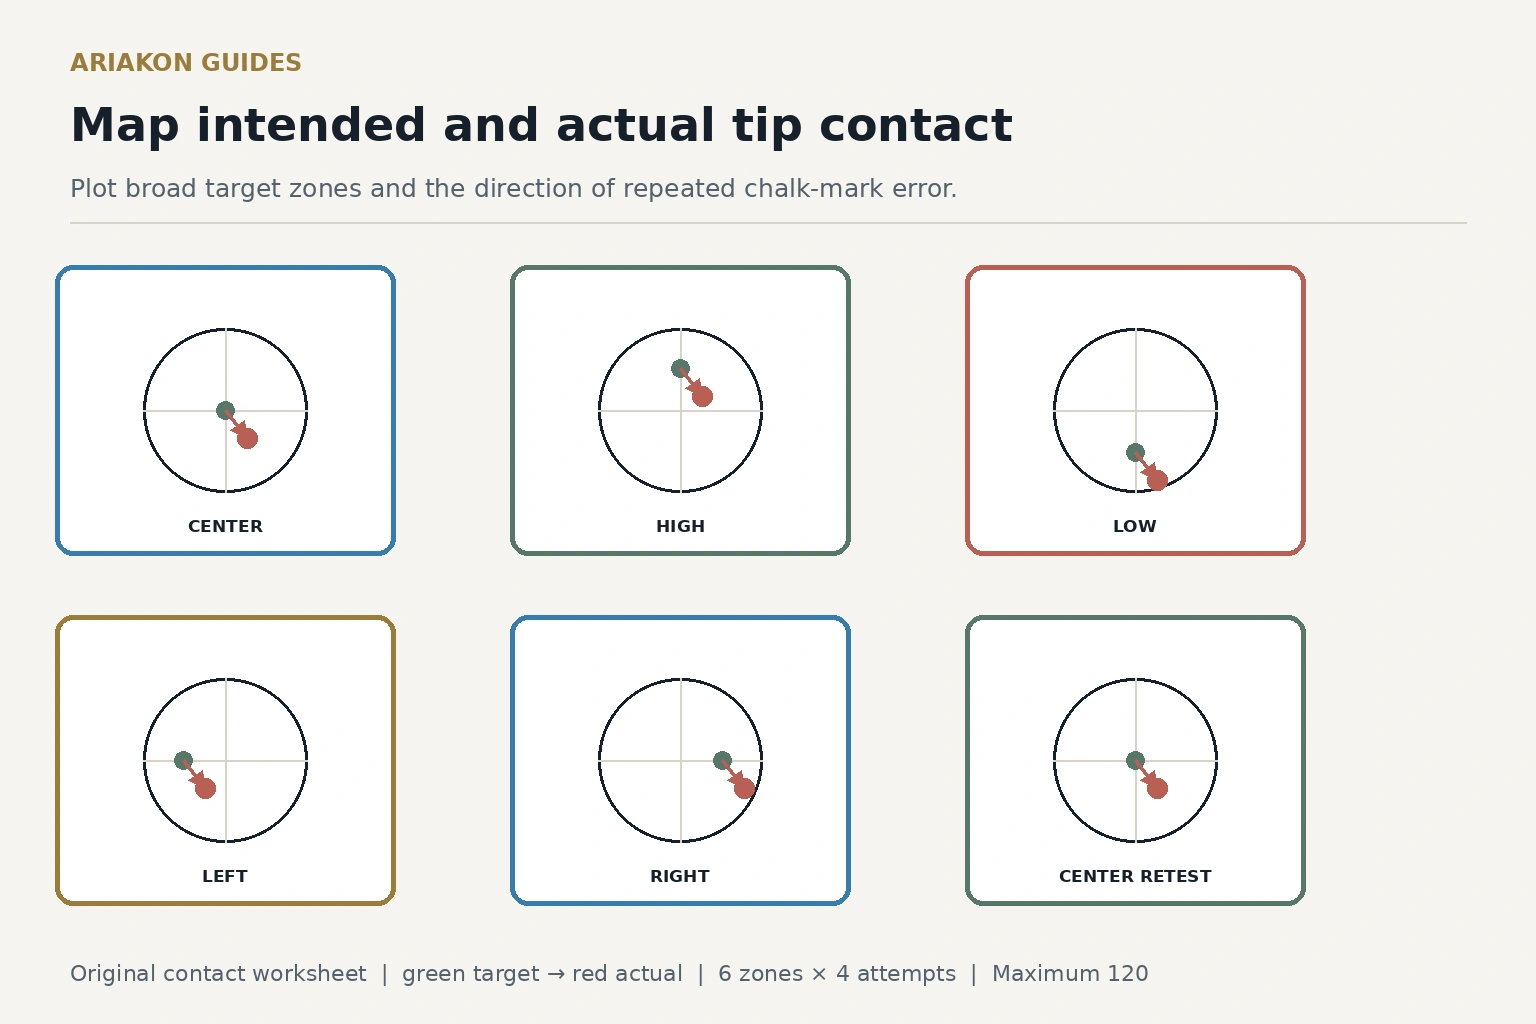
Choose feedback that shows contact without changing the task
Pick one primary method for the whole set. Do not compare results from different ball surfaces as if they were the same instrument. Inspect and clean the practice ball according to its maker or room policy; a chalk smear left on a ball can affect later ball-to-ball contact.
A feedback ball is a diagnostic aid, not a legal match-ball substitute or proof that a particular product improves performance. This worksheet compares fit and use only; it does not rank brands or claim Ariakon inventory.
| Method | Best use | Compatibility check | Tradeoff |
|---|---|---|---|
| Purpose-made marked practice ball | Fast visual alignment and contact review | Use only as its maker directs | Costs more and markings may encourage staring |
| Striped ball used as the cue ball | Vertical-axis center, high and low references | Reserve it for practice and orient the stripe consistently | No fine printed grid |
| Clean ordinary cue ball plus fresh chalk | Observe the post-shot chalk mark | Clean the ball before normal play | Mark can smear or be hard to find |
| Rear or side video | Compare cue delivery with the ball mark | Keep device outside every player and ball path | Contact point may be hidden without good lighting |
Find a dependable visual center first before mapping deliberate offsets.
Use tip-contact-first troubleshooting when one specific stop, follow or draw result fails.
Build a six-zone contact map
Set a straight shot with the object ball one diamond from a corner pocket and the cue ball two diamonds away. Mark both centers with removable flat markers. Use a comfortable pocket-speed delivery. On a worksheet draw six target circles: center, high-center, low-center, left-center, right-center and center again.
Before each attempt, mark the intended dot on the worksheet. After the shot, locate the fresh chalk mark on the practice ball and plot its position in the matching circle. If the mark is missing or smeared, record unreadable; do not guess. Clean only when necessary and reset the ball markings to the cue line.
Shoot and score twenty-four attempts
Broad zones are intentional. Do not invent millimeter precision from a chalk blot. Keep pocket outcome, readable feedback and zone accuracy as separate columns so a made ball cannot hide a repeated contact error.
| Point | Observable result |
|---|---|
| 1 | Target zone called while standing |
| 1 | Ball marking is aligned to the cue line |
| 1 | Fresh contact mark is readable |
| 1 | Actual mark lands inside the called broad zone |
| 1 | Object ball reaches the called pocket |
| Maximum 120 | Twenty-four attempts across six target cards |
Read a direction, not a story
| Repeated pattern | Next test |
|---|---|
| Marks finish higher than intended | Check elbow and tip height from the side |
| Marks finish lower than intended | Check pre-contact grip tightening and cue elevation |
| Marks drift to one side at every height | Check standing alignment and cue corridor from the rear |
| Only off-center targets spread | Reduce offset and confirm a stable center baseline |
| Marks are unreadable | Improve cleaning, chalk contrast or lighting before changing mechanics |
Worked contact map and transfer
A hypothetical player pockets 21 of 24 balls but earns only 78/120. Thirteen readable marks sit below the intended zones, including both final center cards. The first retest is not more draw practice; it is six center-ball attempts with side video to see whether the hand tightens or the tip drops before contact.
After one correction, repeat only the two affected target cards, then play one rack and inspect three planned vertical-axis shots. Use the mark to compare intended with actual contact. A changed mark can come from tip setup or delivery mechanics; the length of the finish alone does not identify the cause.