
Rail shots · 3 min read
Elevated Pool Shots Near the Rail: Adjustments and Risks
A cue ball near a cushion can force the butt upward even when the ball is not frozen to the rail. The useful skill is not hitting down harder. It is recognizing the distance at which clearance changes, using the least elevation that works and lowering speed or shot ambition when contact becomes unreliable.
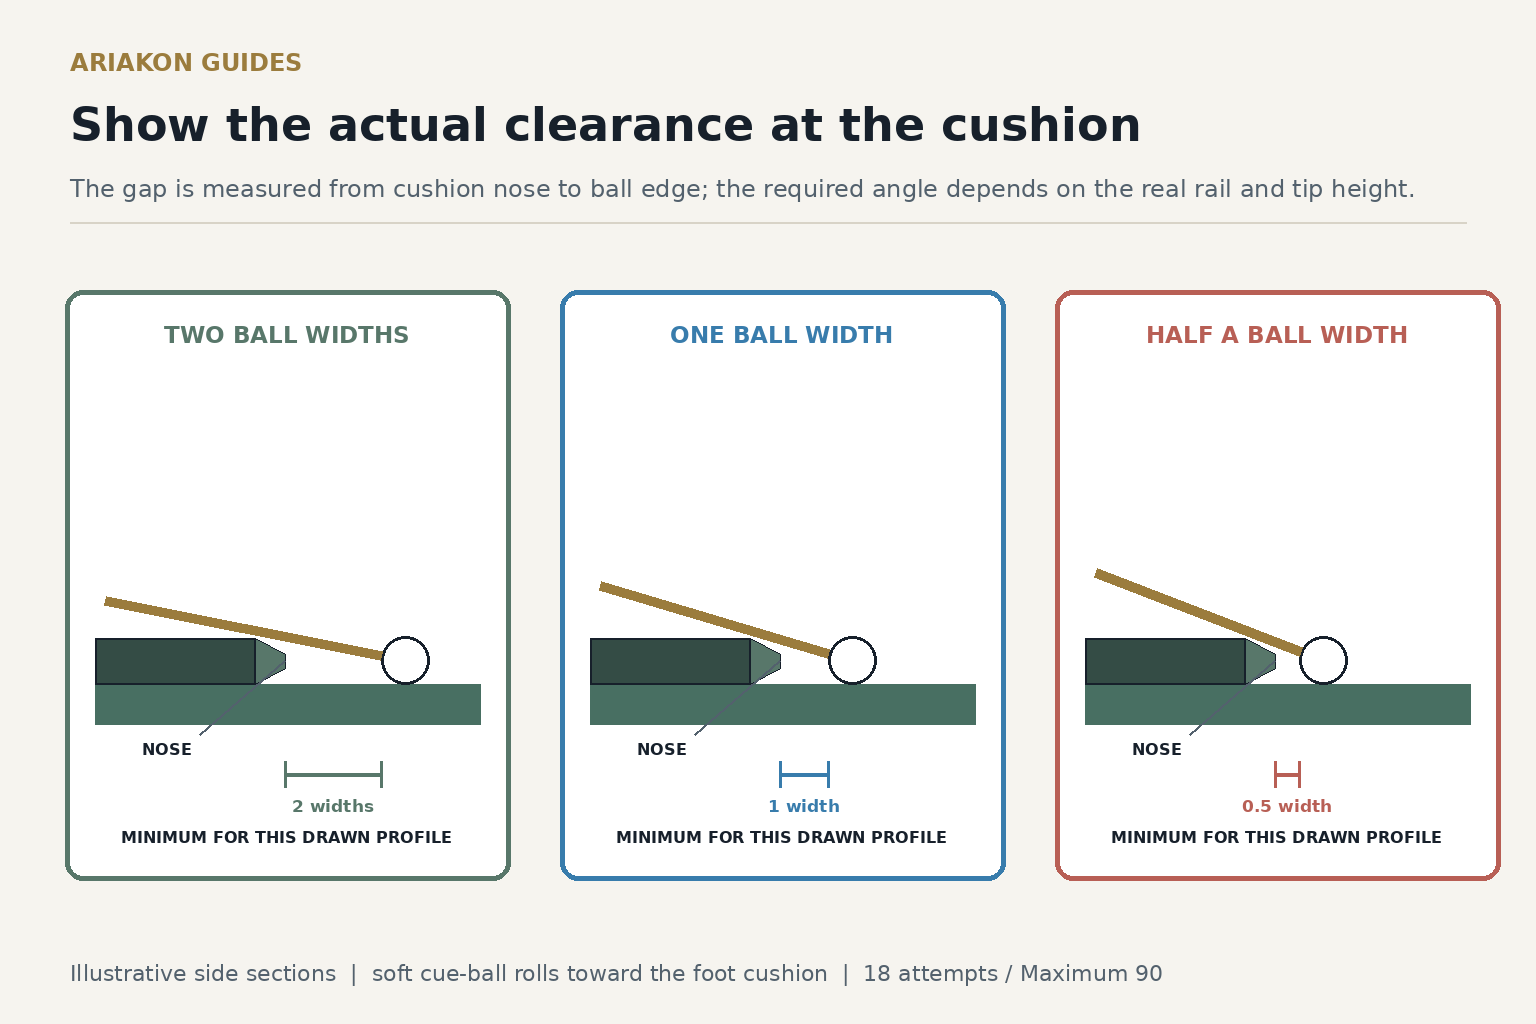
Distinguish the transition zone from a ball frozen to the rail
Measure clearance from the inside cushion nose to the nearest edge of the cue ball, not its center. This drill uses gaps of two ball widths, one ball width and half a ball width at the head cushion. The rail bridge guide covers hand placement; this exercise measures contact and clearance as the gap shrinks. The cross-section is illustrative: actual cushion profile, cue diameter and tip height determine the minimum angle.
At each distance, address the shot as level as the rail and grip-hand clearance allow. Raise the butt only enough to complete the backswing and delivery without touching the cushion. Do not press the tip into the cloth or practice intentional jump or massé techniques in this progression.
Use the cue-ball-on-rail guide when the ball is frozen or nearly frozen.
Build a stable rail bridge when the cloth hand base is unavailable.
Remove unnecessary elevation first before accepting the angle the rail requires.
Set three clearance stations
Remove all object balls. At table-width center, place the cue ball at each stated gap from the head cushion and aim toward the center of the foot cushion. Mark the three starts in a paper record and use only removable aids allowed by the room. Shoot six soft vertical-axis attempts per start. Choose enough speed to reach the foot cushion, without forcing a full return. Stop immediately if the tip, ferrule, hand or cue contacts the rail unexpectedly. Record the foot-cushion arrival within a one-diamond-wide band centered on the table axis.
| Station | Cue-ball distance from cushion | Primary adjustment |
|---|---|---|
| A | Two ball widths | Near-level cue and ordinary compact bridge |
| B | One ball width | Shorter bridge and only necessary elevation |
| C | About half a ball width | Rail-supported bridge, compact stroke and lower ambition |
Score eighteen controlled attempts
| Point | Observable result |
|---|---|
| 1 | Clearance plan called while standing |
| 1 | Bridge and grip clear the rail |
| 1 | Tip contacts the called vertical-axis zone |
| 1 | No visible unintended hop before object-ball contact |
| 1 | Cue ball reaches the marked center band on the foot cushion |
| Maximum 90 | Six attempts at each rail distance |
Treat elevation as a risk budget
| Evidence | Next action |
|---|---|
| Cue or hand strikes the rail | Shorten bridge or change support before shooting again |
| Cue ball hops while speed is low | Reduce unnecessary elevation and verify centerline contact |
| Tip mark moves low or sideways | Quiet the transition and reduce delivery speed |
| Follow-through drives toward cloth | Use a compact natural finish; do not force extension |
| Station C remains unreliable | Choose a defensive or simpler game option |
Worked example and rack transfer
A hypothetical player scores 28/30 at two ball widths, 23/30 at one and 15/30 at half a ball width. Four close-rail attempts show extra elevation added after address, visible hop and a low tip mark. The next set uses the rail-supported bridge, aims while the cue is lower, then raises only to the measured clearance.
During two practice racks, tag every shot where cushion clearance raises the butt. Call ordinary, transition or frozen-to-rail before bending. Keep the bridge planted and use only the angle needed for the complete cue corridor. Added elevation can increase hop and reduce contact margin, so choose a simpler legal option when reliable delivery is unavailable.